How to change the One Stop Order Processing Invoices, Packing Lists and Purchase Orders
There are several standard Invoices, Packing Lists and Purchase Order layouts provided with One Stop Order Processing. These have been designed to suit standard paper types and uses. If the layout isn't exactly how you would like it you can make various changes to one of the existing templates (which can be saved as your own format). This document explains how to make changes to the templates.
Adding messages (or other text) adding logos and PPIs
One Stop Order Processing uses macros that are replaced with text, images or order details when printed. Several macros are setup as standard.
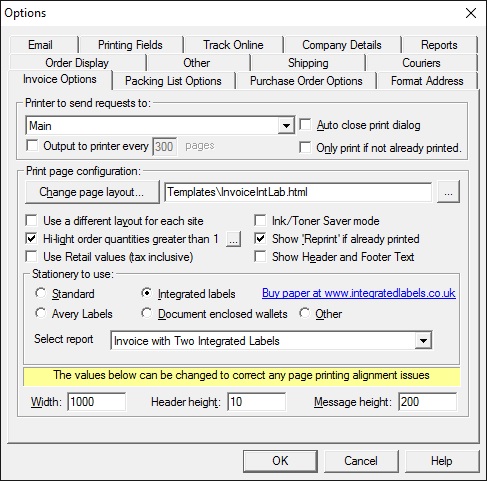
You can view and amend the Macros in the Printing Fields tab in the Options, shown below.
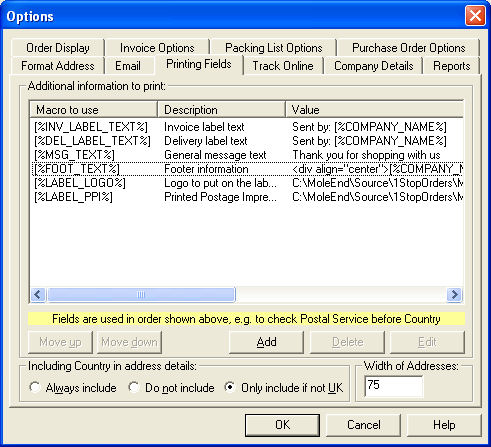
| [%INV_LABEL_TEXT%] |
The text that appears at the bottom of the invoice integrated label. This defaults to your company name. |
| [%DEL_LABEL_TEXT%] |
The text that appears at the bottom of the delivery integrated label. This defaults to your company name. |
| [%MSG_TEXT%] |
The message to display at the bottom of the form (e.g. Invoice). This defaults to Thank you for shopping with us. |
| [%FOOT_TEXT%] |
This is the text that appears at the bottom of the form (e.g. Purchase Order). This defaults to your company name, address and company number (and VAT number). |
| [%LABEL_LOGO%] |
If you want to display a logo on your form (e.g. Packing List) select an image. This defaults to no image being shown.
An ideal size for the logo is 60 by 60 pixels.
If you want to use a larger logo and adjust its size for the invoice add the text
" width="{width}" height="{height}
to the end of the filename.
Change the {width} and {height} values to the size required. For example, change
https://www.1stoporders.co.uk/1stopmain2.jpg
to
https://www.1stoporders.co.uk/1stopmain2.jpg" width="100" height="200
You should also change the Type to Text
If you need further changes you can amend the HTML template using an HTML editor. |
| [%LABEL_PPI%] |
If you want to display a PPI on your form's label (e.g. Invoice) select a PPI image. This defaults to not using a PPI. |
A macro can contain text, images or html. For example, if you want to include an image and text in your message at the bottom of the invoice enter the text and the html to include an image.
For example, to display the following as your message:
Thank you for shopping with us

use the text
div align="center"><br />
Thank you for shopping with us<br />
<img src="1stoporders32logo.jpg" />
</div>
as the Macro Value (of Type Text).
You can also define your own macros. It is important that if you do create your own macros you should also add their values to the Invoice, Packing List or Purchase Order used. For more details on how to use different macro values for different orders click here.
Changing the size of text on delivery labels
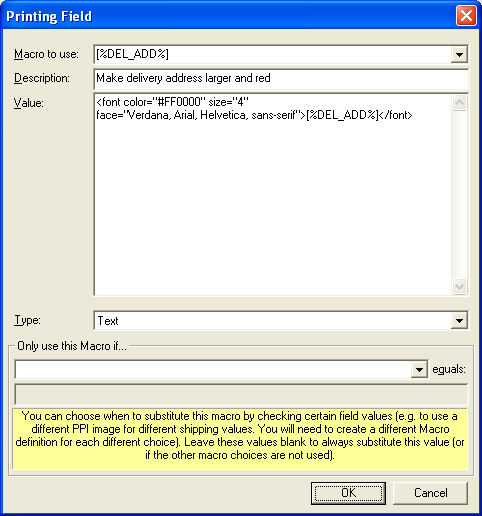
You can do this in 2 ways. For individual values (Macros), replace the macro with a new font and type. For example, to change the delivery address (on a label) to a larger red font replace the macro value with:
<font color="#FF0000" size="4" face="Verdana, Arial, Helvetica, sans-serif">[%DEL_ADD%]</font>
This is shown below:
Another approach is to change the printing style of the Invoice, Packng List or Purchase Order. In the main installation directory (by default, C:\OSOP\Main) are printing files called 1stopprintIE.css and 1stopprintIE7.css.
These files change the general printing characteristics of the Invoices, Packing Lists and Purchase Orders.
For the delivery address change the size for .is2 from font-size: 14pt; to a higher value (e.g. 16pt);
Displaying Barcodes on the Invoice, Packing List or Purchase Order
You can amend your Invoices, Packing Lists and Purchase Orders to show barcodes (to save re-keying the order number) by using the following approach:
1 Download and install a barcode font. There are several free ones available including the following:
http://www.idautomation.com/free-barcode-products/code39-font/
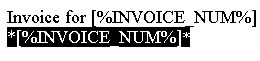
2 Amend the HTML template using your HTML editor (e.g. Dreamweaver). Copy the relevant text that you want as a barcode and add a * at either side to indicate the start and stop characters for the barode scanner. (e.g. *[%ORD_NUM%]* ), shown below:
3 Assign the text the relevant barcode font (e.g. IDAutomationHC39M), shown below:
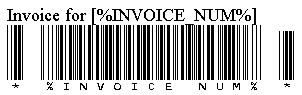
4 When printed it will now show the required details as a barcode, an example is shown below.

5 Advanced more detailed setup.
If you are using html directly (or want to use printing macros to use barcodes) you can use the following HTML to use the barcodes. Assuming that you are using the barcode font shown above, add the following text to the HTML header, just before the </head> line.
<style type="text/css">
<!--
.style1 {font-family: IDAutomationHC39M}
-->
</style>
Change the font to use for the relevant text using this style, e.g.
To change the text [%ORD_NUM%] into a barcode simply replace with
<div class="style1"> *[%ORD_NUM%]* </div>
Other Printing Help
Orders printing onto 2 pages
If your Invoice, Purchase Order or Packing List prints onto 2 pages you should change the Page Message Height to a lower value (to decrease the gap at the bottom of the page). This field is at the bottom of the Invoice, Packing List and Purchase Order Option pages, shown below:
Removing the text at the top and bottom of the Invoice, Packing List or Purchase Order
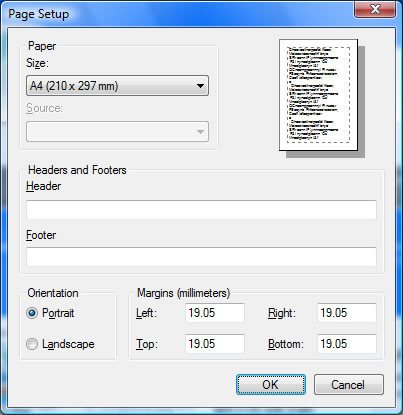
You can remove the text displayed at the top and bottom of the Invoice, Packing List or Purchase Order in Internet Explorer, by removing the text in the Headers and Footers options in the Page Setup (under the File menu). This is shown below:
Invoices, Packing Lists, Purchase Orders not printing (but can be previewed)
This can happen if you do not have the printer setup or if you are using Internet Explorer's Content Advisor. You should make sure that a printer has been setup (in the Options). By default the first printer found is used, which may not be the correct printer. You should change (or disable) the Content Advisor if this still fails to print.
Invoices, Packing Lists or Purchase Orders don't print a logo and/or the background colours
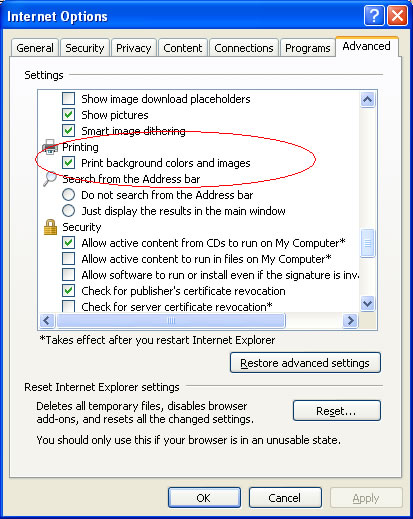
You need to turn on the Print background colors and images in the Advanced Options in Internet Explorer, shown below
Adding additional text to specific Invoices, Packing Lists or Purchase Orders
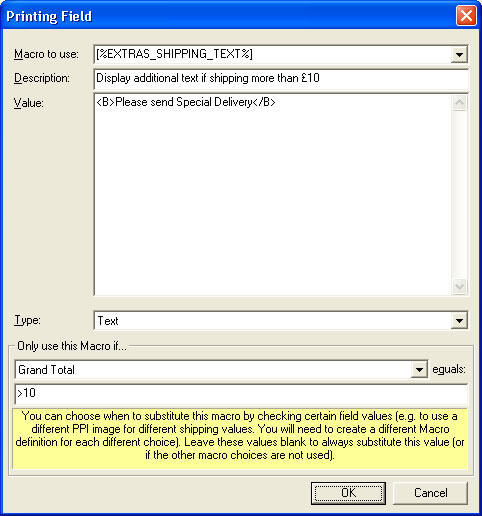
If you want to display additional text or change how existing values are shown only for certain Packing Lists (or Purchase Orders or Invoices) you can use the Printing Field macros. For example to display Please send Special Delivery on all Packing Lists for orders with an order value of £10 or more, do the following:
1. Open the Printing Fields options (select the Printing Fields tab in the Options dialog). Click on the Add button. Define a new Printing Field called [%EXTRA_SHIPPING_TEXT%].
2. Fill in a suitable description for the macro and the text to display.
3. Select the Grand Total field in the Only use Macro if section. Enter a value of >10. This is shown below:
4. You then need to amend the Packing List and add the text [%EXTRA_SHIPPING_TEXT%] at the relevant place in the packing list.
This will now only display this text if the Grand Total for the order is more than 10. |
Using Microsoft Word to amend and print the Invoice Templates (in the same way used by the Invoicing software from https://www.integratedlabels.co.uk)
One Stop Order Processing provides Invoice templates written using HTML (HyperText Markup Language). The templates provided by the IL_Invoicing software are wriiten in RTF (Rich Text Format). To print from One Stop Order Processing using the RTF templates you need to do the following:
1. Download and save the view from here MicrosofWordInvoices.mev:
2. Select the View->Customize Current View menu option.
3. Click on the Import button.
4. Select the orders to print from Microsoft Word .
5. Click on the Export Orders button ( ). ).
6. Click on the Export orders button.
7.
Download and save the Microsoft Word template from here (IL_Invoices.rtf).
8. Perform the Word Mail Merge as described in the following document, when selecting the orders file select the file C:\OSOP\Orders.csv.
https://www.integratedlabels.co.uk/IntegratedSMProDef.html
Start from point 6, Open the installed Word document.
|